
Minimise Noise on Blackmagic Pocket Cinema Cameras - 7 Important Tips

From the time of this post, I’ve owned a Blackmagic Pocket 6K Pro for almost a year now, and I absolutely love it. It’s a completely hands-on, manual camera, with no auto-focus or the conveniences of most DSLR or mirrorless cameras out there, but really teaches you how camera dynamics work, and is perfect for cinematography work, in contrast to regular videography, as many people distinguish. As a result, there’s a lot of control you have, and hence, a lot of areas where filming with these baby cinema cameras can go wrong.
Camera noise is a common problem amongst a lot cameras, and budding creators, in most cases it’s something we try to avoid. Predominantly, it comes from raising ISO too high, where camera sensor sensitivity is tested to the limits. With the Blackmagic Pocket Cinema Cameras, especially considering the great value, this is an area of weakness which is often tested, in low light scenarios. Many people, when first picking up these cameras can find it difficult to expose correctly in low light, and avoid noise, filming footage that is ruined by gunk and noise.
From my experience over the last year, I’ve learned seven great ways to reduce noise when filming with Blackmagic Pocket Cinema Cameras, seven of which I’d like to share with you, and hopefully you can implement for your next shoot.
Tip One: Know your cameras Native ISO
Blackmagic Cameras have native ISO levels, this is where the camera has the most amount of stops of dynamic range above and below base line in total. With the 6K pro, this is at ISO 400 and 3200, with 400 being most suitable for bright outdoors, and 3200 being more suitable for night time shooting. However, this isn’t always the case, it’s best to visually see the difference between noise when switching between these two native ISO’s. Filming at either 400 or 3200 will bring benefits in post production too, especially when shooting in BRAW, as you’ll have the most amount of latitude to play with, when filming at either of these ISO’s.
It is worth noting that when shooting at ISO 400, light sensitivity is a whole lot less compared to ISO 3200, so you’ll need to make exposure compensation for this elsewhere, through either having a faster aperture at f /1.8 for example, or decrease your shutter speed, however this will increase motion blur.
This graph from Blackmagics website, is a great tool to use, to identify where the most stops of dynamic range lie, above and below baseline.
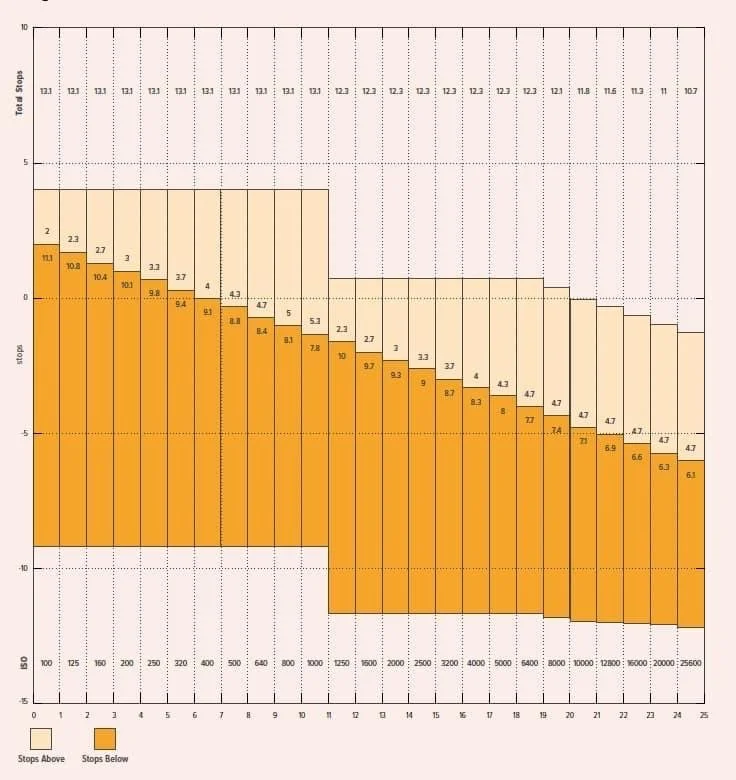
Stops of Dynamic range for the Pocket 6K and 6K Pro, at each ISO level.
Tip Two: Focus assist is your best friend! On your Blackmagic camera turn on focus assist to around about 75% and flick between different levels of ISO and exposure, and you’ll notice that in dark regions of the frame, focus assist will pick up noise. This tool is wonderful when monitoring noise levels on the screen on the back of the cameras, and I rely on it all the time to discover whether or not there is a lot of noise within a given frame.
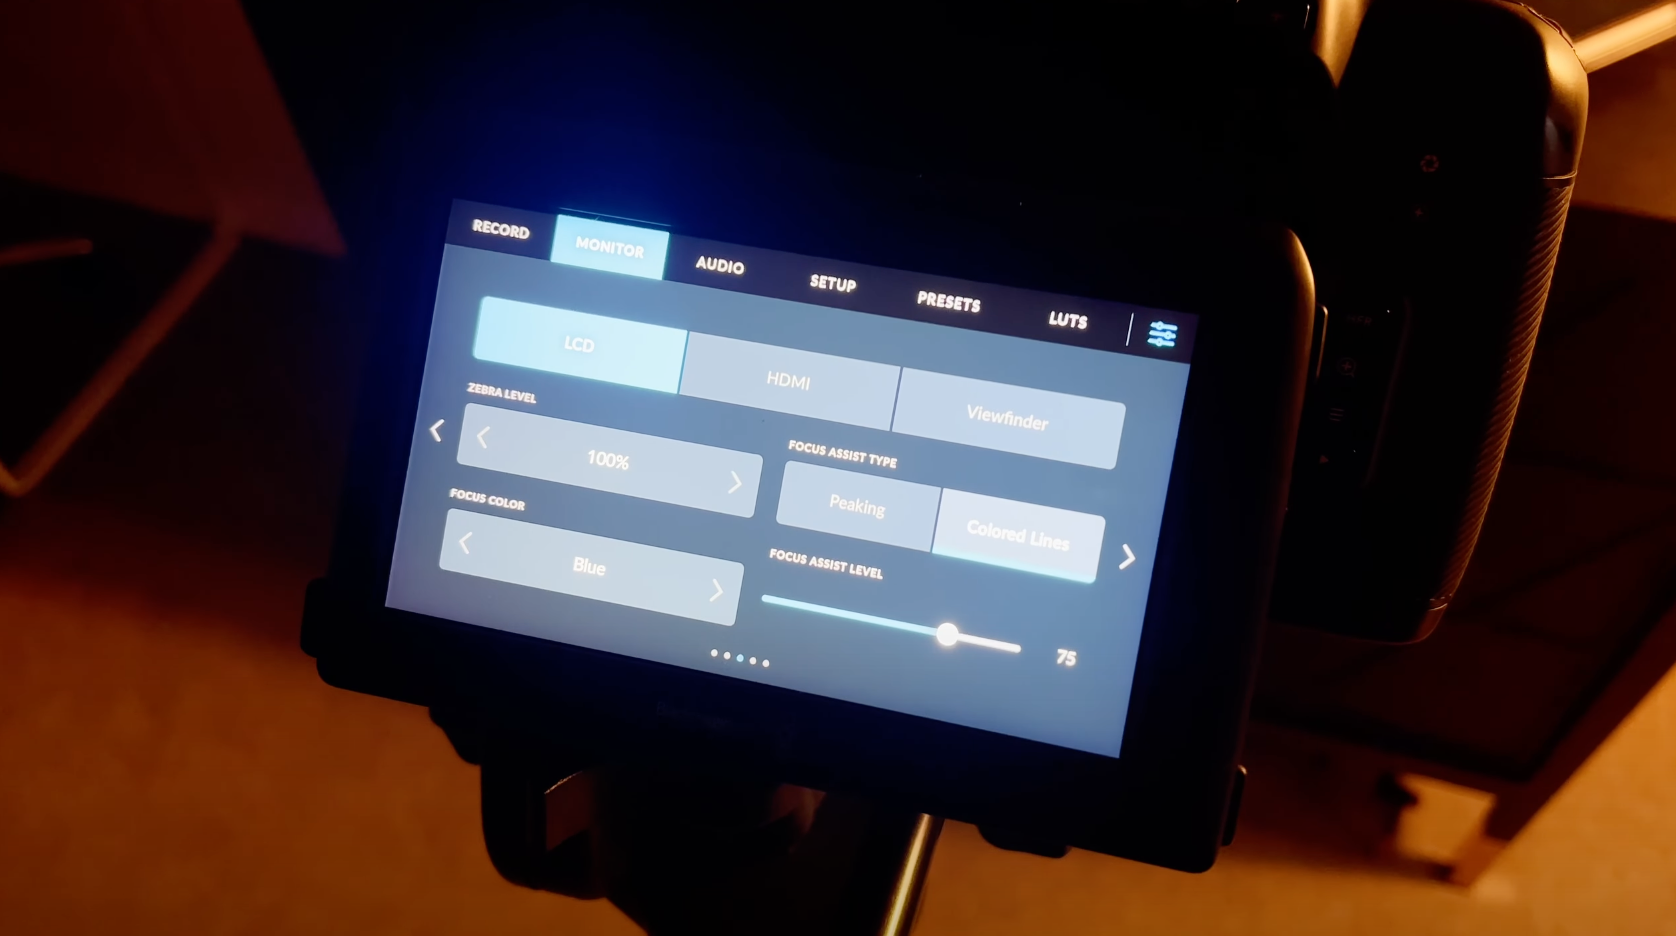
In settings under the third page in the Monitor section, set Focus assist to a colour of your choice, with a level of 75%.
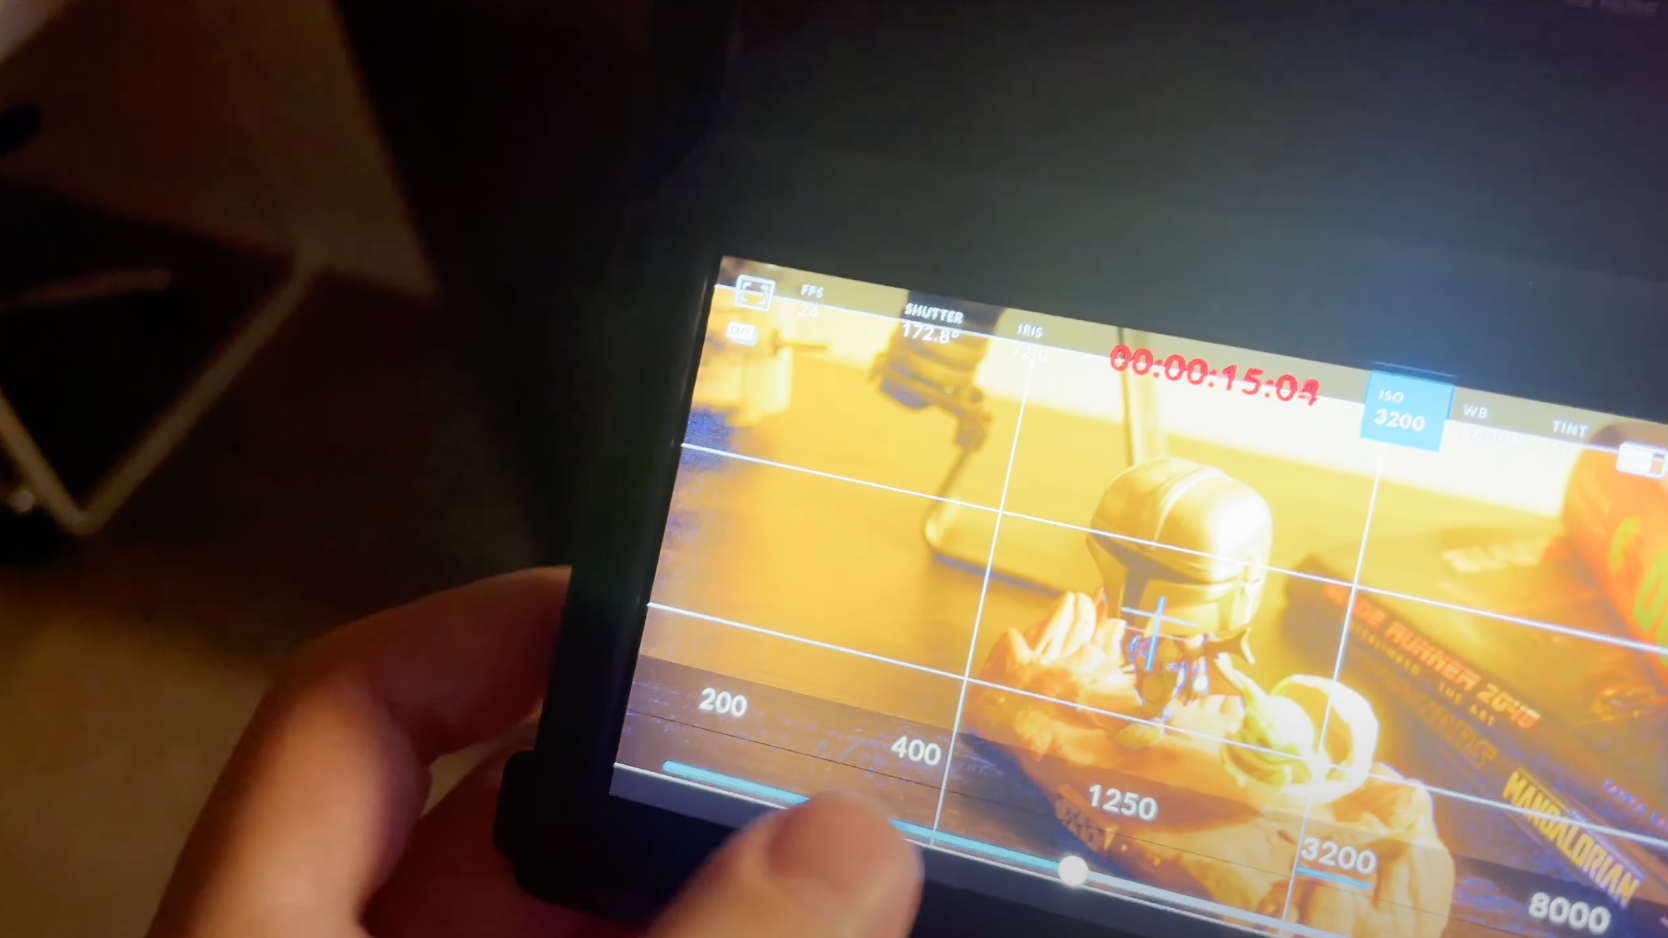
Note in the top left corner at ISO 3200, there is a lot of noise being picked up in this frame using focus assist!
Tip Three: Shoot open as wide as you can! This applies to any camera really, and it’s quite an obvious one, but the wider open you shoot with your lens, the more light you let into your sensor. The more light, the less trouble your camera will have in exposing an image without noise. However, tread with caution here, as it becomes a lot harder to manually focus with a low aperture, due to the shallow Depth of Field that comes into play.
Tip Four: Light your subject appropriately. Cameras these days are amazing, but they’re ultimately not magic. Cinematography is 90% and beyond about lighting and 10% about the camera + hardware itself. Ensure you’re properly lighting your subject, based on the story and emotion you want to convey for that particular scene.
Tip Five: Video codecs. Blackmagic cameras natively, can shoot in either ProRes or Blackmagic Raw. Although large and slightly more difficult to shoot with, I highly recommend shooting in Blackmagic Raw, as you’ll have the most amount of wiggle room to play with in post, with a significant amount of camera data being captured and the time of a shoot.
With 12:1 being the most amount of compression and 3:1 being the least amount of compression; I highly recommend shooting at either 8:1 or 5:1, if you have the storage space capacity. The biggest tradeoff with quality occurs when you jump from 8:1 to 12:1, and it’s especially noticeable in low light. Most low light shoots I capture in 5:1, just in case, but the majority of general shoots I capture at 8:1, with 12:1 being reserved for well lit interview style footage.
Tip Six: If you bought any pocket camera new recently, it comes with the paid version of DaVinci Resolve Studio for free, which is an absolute steal. With that you get the motion / noise reduction tool (It’s called Motion Effects), which can really save noisy footage when used right, but you do need a computer with a decent level of power, or a lot of patience when it comes to the export.
It can be found in the colour page, and it’s great for removing noise in post production.
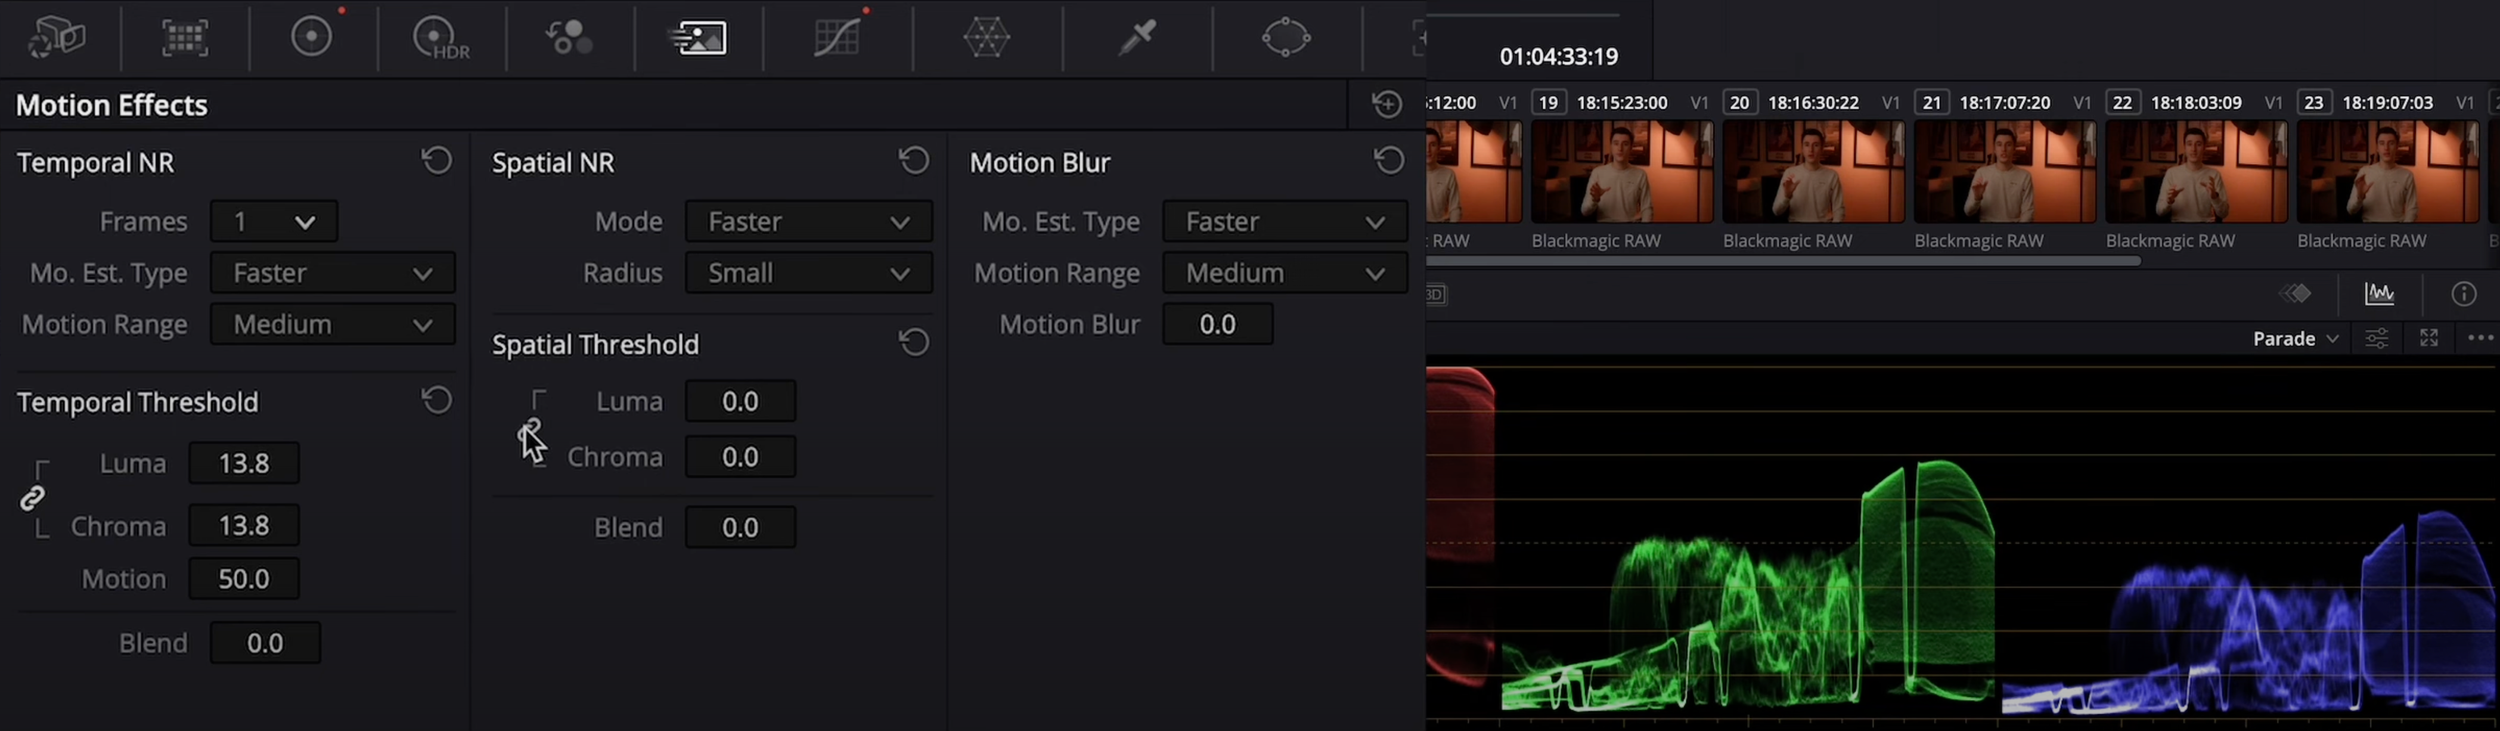
Setting Frames to 1, Luma + Chrome to 20, and Spatial Threshold Unlinked with chrome set to 5, is a great strategy here!
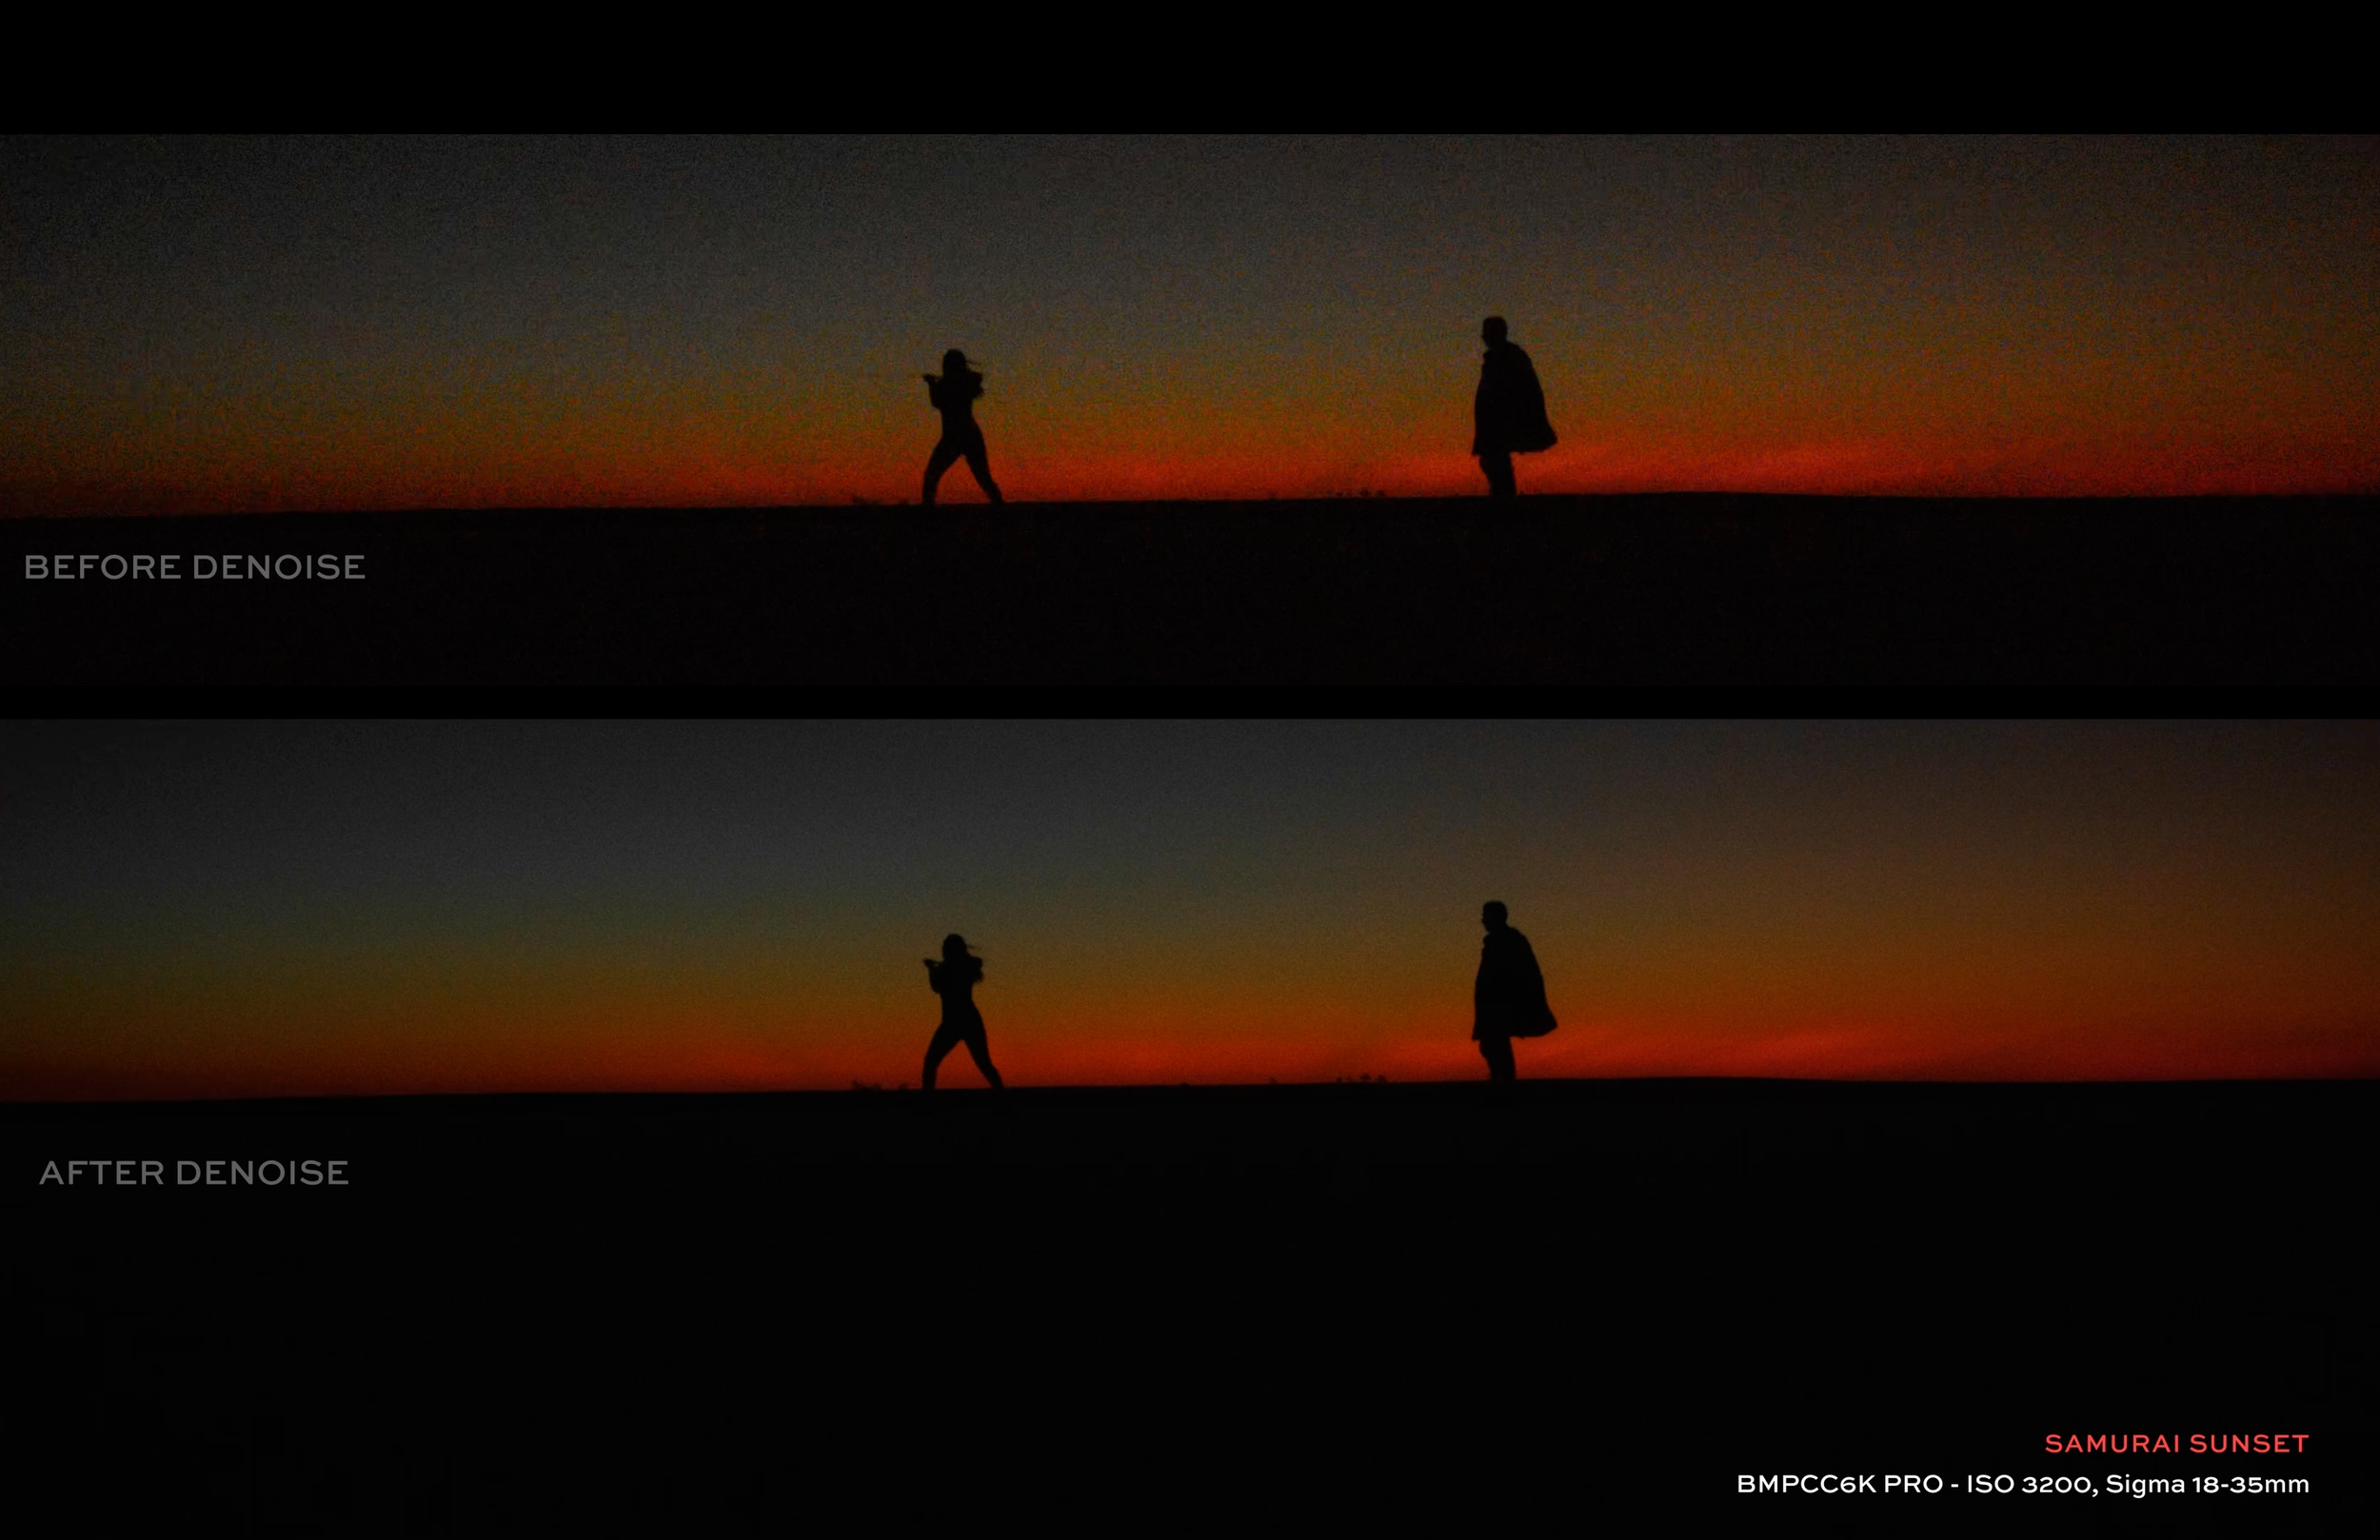
Motion effects comparison, before and after when reducing noise.
Tip Seven: My preferred ISO setting when shooting in low light is honestly ISO 400, as this gives me the most amount of dynamic range latitude throughout the entire image with 13.1 stops of dynamic range throughout above and below baseline.
I’ve noticed the best noise performance at this level, particularly in low light shoots and usually use this native ISO level to act as my baseline. This in combination with focus assist to determine noise level is really your best friend. It’s worth noting that many love to shoot at ISO 1250 with the Pocket 6K and 6K Pro, as this level offers the most amount of dynamic range in darker regions at over 10 spots. (compared to just over 9 at ISO 400) BUT, use this with caution and only when there is very limited light.
This is due to the fact that your highlights will clip very easily at this level, meaning if you have any light sources in your frame, you’ll most likely have these over expose quite easily. I rarely shoot here, and prefer to combine good lighting, with ISO 400.
Bonus Tip: The Golden Formula = Comparing ISO’s + Using Focus Assist is your best friend.
Doing so by switching between ISO levels quickly on your camera whilst comparing the amount of grain picked up by the focus assist is a great way to monitor how much noise you can expect.
If videos are more your thing to learning, I made a video too about the topic:
Happy shooting! If you have any questions, feel free to email me over at hello@designedbykirk.com or send me a message on socials over at @DesignedbyKirk.