
Behind the Scenes - Gentleman Fashion Ad

An Intro to the Project:
Major Hollywood blockbusters and modern cinema in today’s era, undoubtedly has a huge influence on my life, and the way I choose my creative projects I work on, throughout my cinematography journey. Films such as Blade Runner 2049, Ford v Ferrari, Interstellar and Guy Ritchie’s The Gentleman, just to name a few. Considering the latter, The Gentleman, a recent gangster film set in modern UK, specifically the intro the film, inspired me to work on project that emanated similar emotions through costume design, set location, fashion and sound. So the opportunity arose and the idea came to fruitionto shoot a short fashion film style ad, for an incredible local Melbourne brand with creativity inspiration from such a film.
As a result, with a bit of location searching, finding Mitchell McCabe in South Melbourne, some incredible music by David Rawlings (Cumberland Gap) and a great, but small crew, we were set to create an awesome fashion ad, with the modern gentleman in mind. In this piece, I wanted to share the production process, the shooting, gear and post processes that were involved in creating the piece “Be a Gentleman” for Mitchell McCabe.


The Inspiration
As mentioned, I’ve been heavily inspired by modern cinema, but it’s the look of older films that have really caught my eye. Specifically, Michael Mann’s Heat, and even more finitely the Dockyard scenes presented towards the halfway point of the film. This in combination with the fashion style of The Gentleman, is all we needed for location, setting and look for our short fashion film.

Source: Heat, Warner Brothers
We quickly went on the hunt to find a location in Melbourne that was reminiscent of dockyards, with two problems persisting. Firstly, dock locations aren’t easy to come by that are easily accessible to the public, and secondly, Australia in my opinion has quite an “Australian look”, no matter where you film, so I wanted to avoid both of these things as much as possible. Luckily, we found a discrete location in Docklands, a shipping district just on the outskirts of Melbourne, on a cold, but sunny Saturday afternoon, and spent a few hours of shooting

The Gear:
In terms of Camera, Electrical, Lighting and Special affects gear we kept everything quite lightweight.
The Camera Rig:
Blackmagic Pocket 6K Pro
Sigma 18-35mm
Peak Design Strap
Tiffen Black Promist 1/4 Filter
All shots were handheld
In terms of other gear, we kept it pretty simple, consider there was no way of powering lighting on location, that as out of the question. Although we did have the opportunity to use screens, bouncers, modifiers etc… but chose (for better or worse), to not use these, and shoot just using natural light, and a bit of good old fashion blocking with our small crew on the ‘set’.
Shoutout to Tia for being excellent help here. Speaking of, Tia also operated our smoke machine which was connected to a low powered generator. Which created our smoke effect coming from the car. The generator only had one port, so using lights as well with this wasn’t quite possible on this one.
As mentioned, the camera as well was completely handheld. With the only stability coming from my Peak Design Strap, attached to the camera for some added stability, with the remaining being done in post. If I were to do this shoot again, for the safety of my back, I’d be hiring an EasyRig without hesitation, and perhaps look into a better supported shoulder rig for the camera.
Shooting on Set:
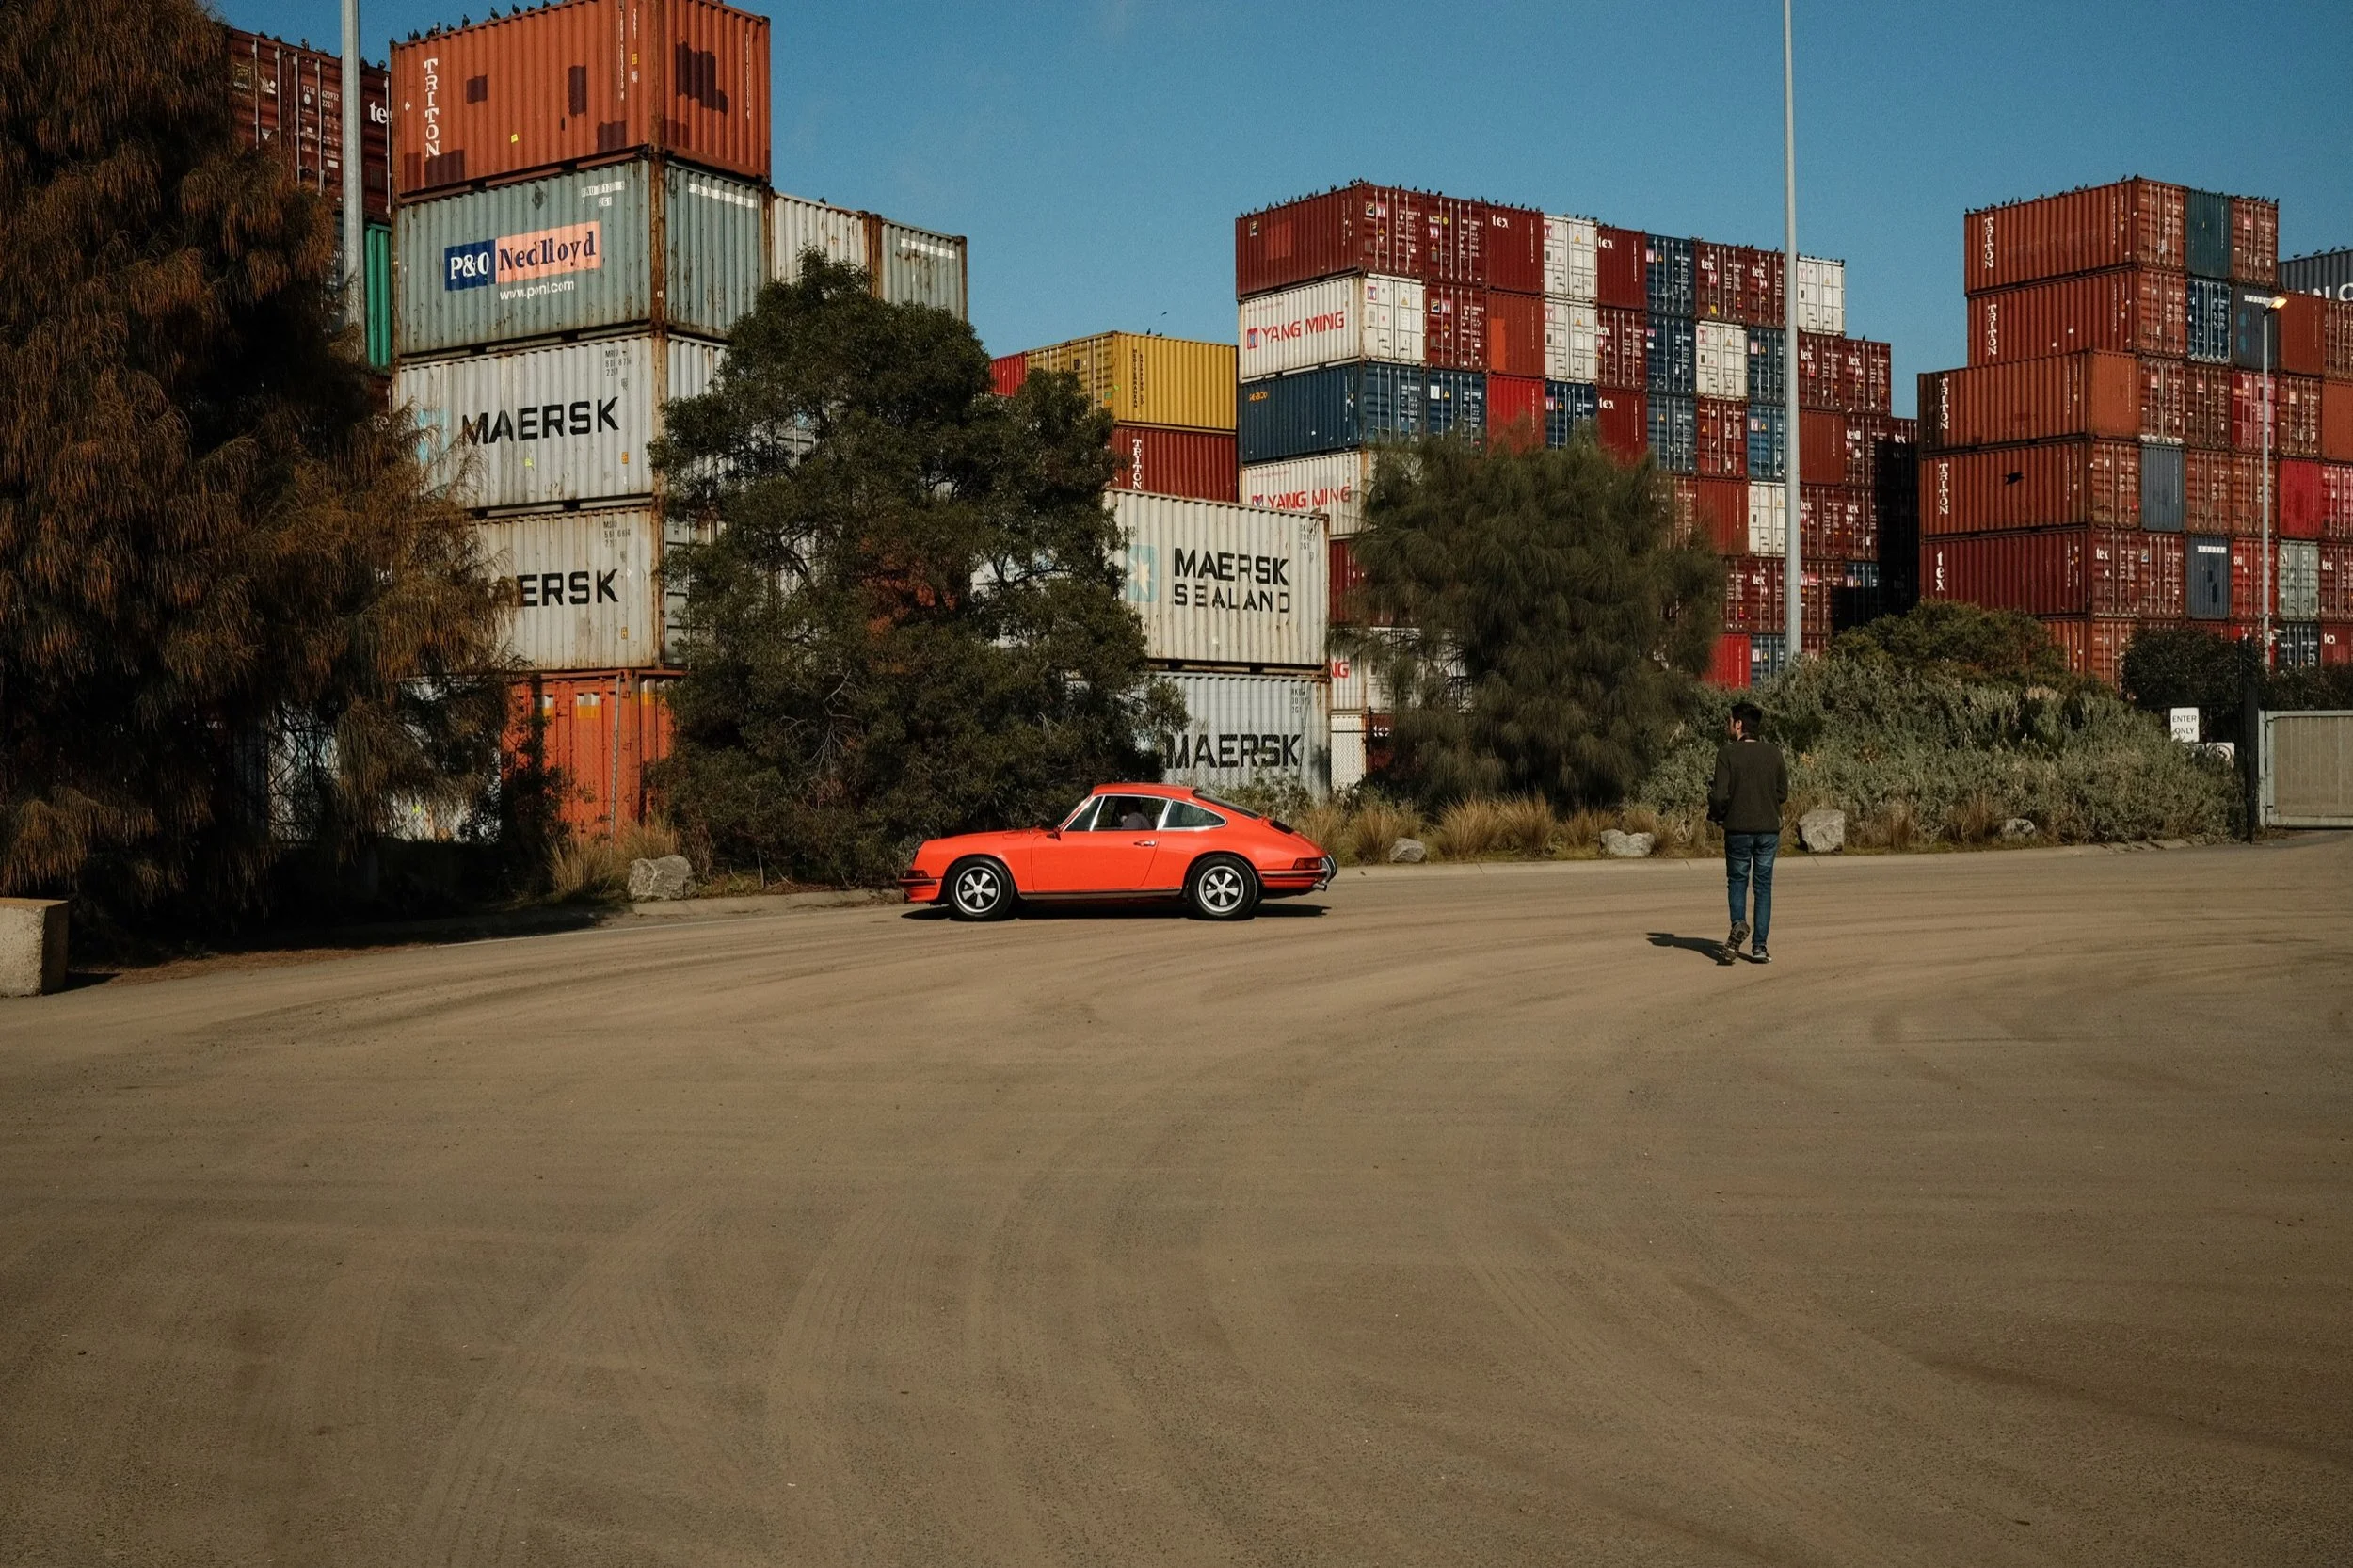
Once on location, and quickly setting up our respective camera gear whilst waiting for the wonderful 911 E in orange to arrive. We quickly scouted where we wanted to place the car. It became quickly obvious based on sun positioning, that we wanted our subject to be mostly side-lit, or backlit from the sun. Plus, we wanted to great backdrop, so we placed the car in front of large stack of shipping containers, resembling those scenes mentioned from Heat.
The colour contrast from the sky, and the variety of shipping containers, provided a great overall set for us, without having to lift a finger! Ultimately, we couldn’t have been any happier with how the location turned out, with the slight exception of potentially having a preference of not shooing in the middle of the day next time. Due to the harsh lighting conditions, but we managed. Once again, a 5x5 diffuser probably would of mitigated issues with harsh lighting if we were to shoot at noon in the end.
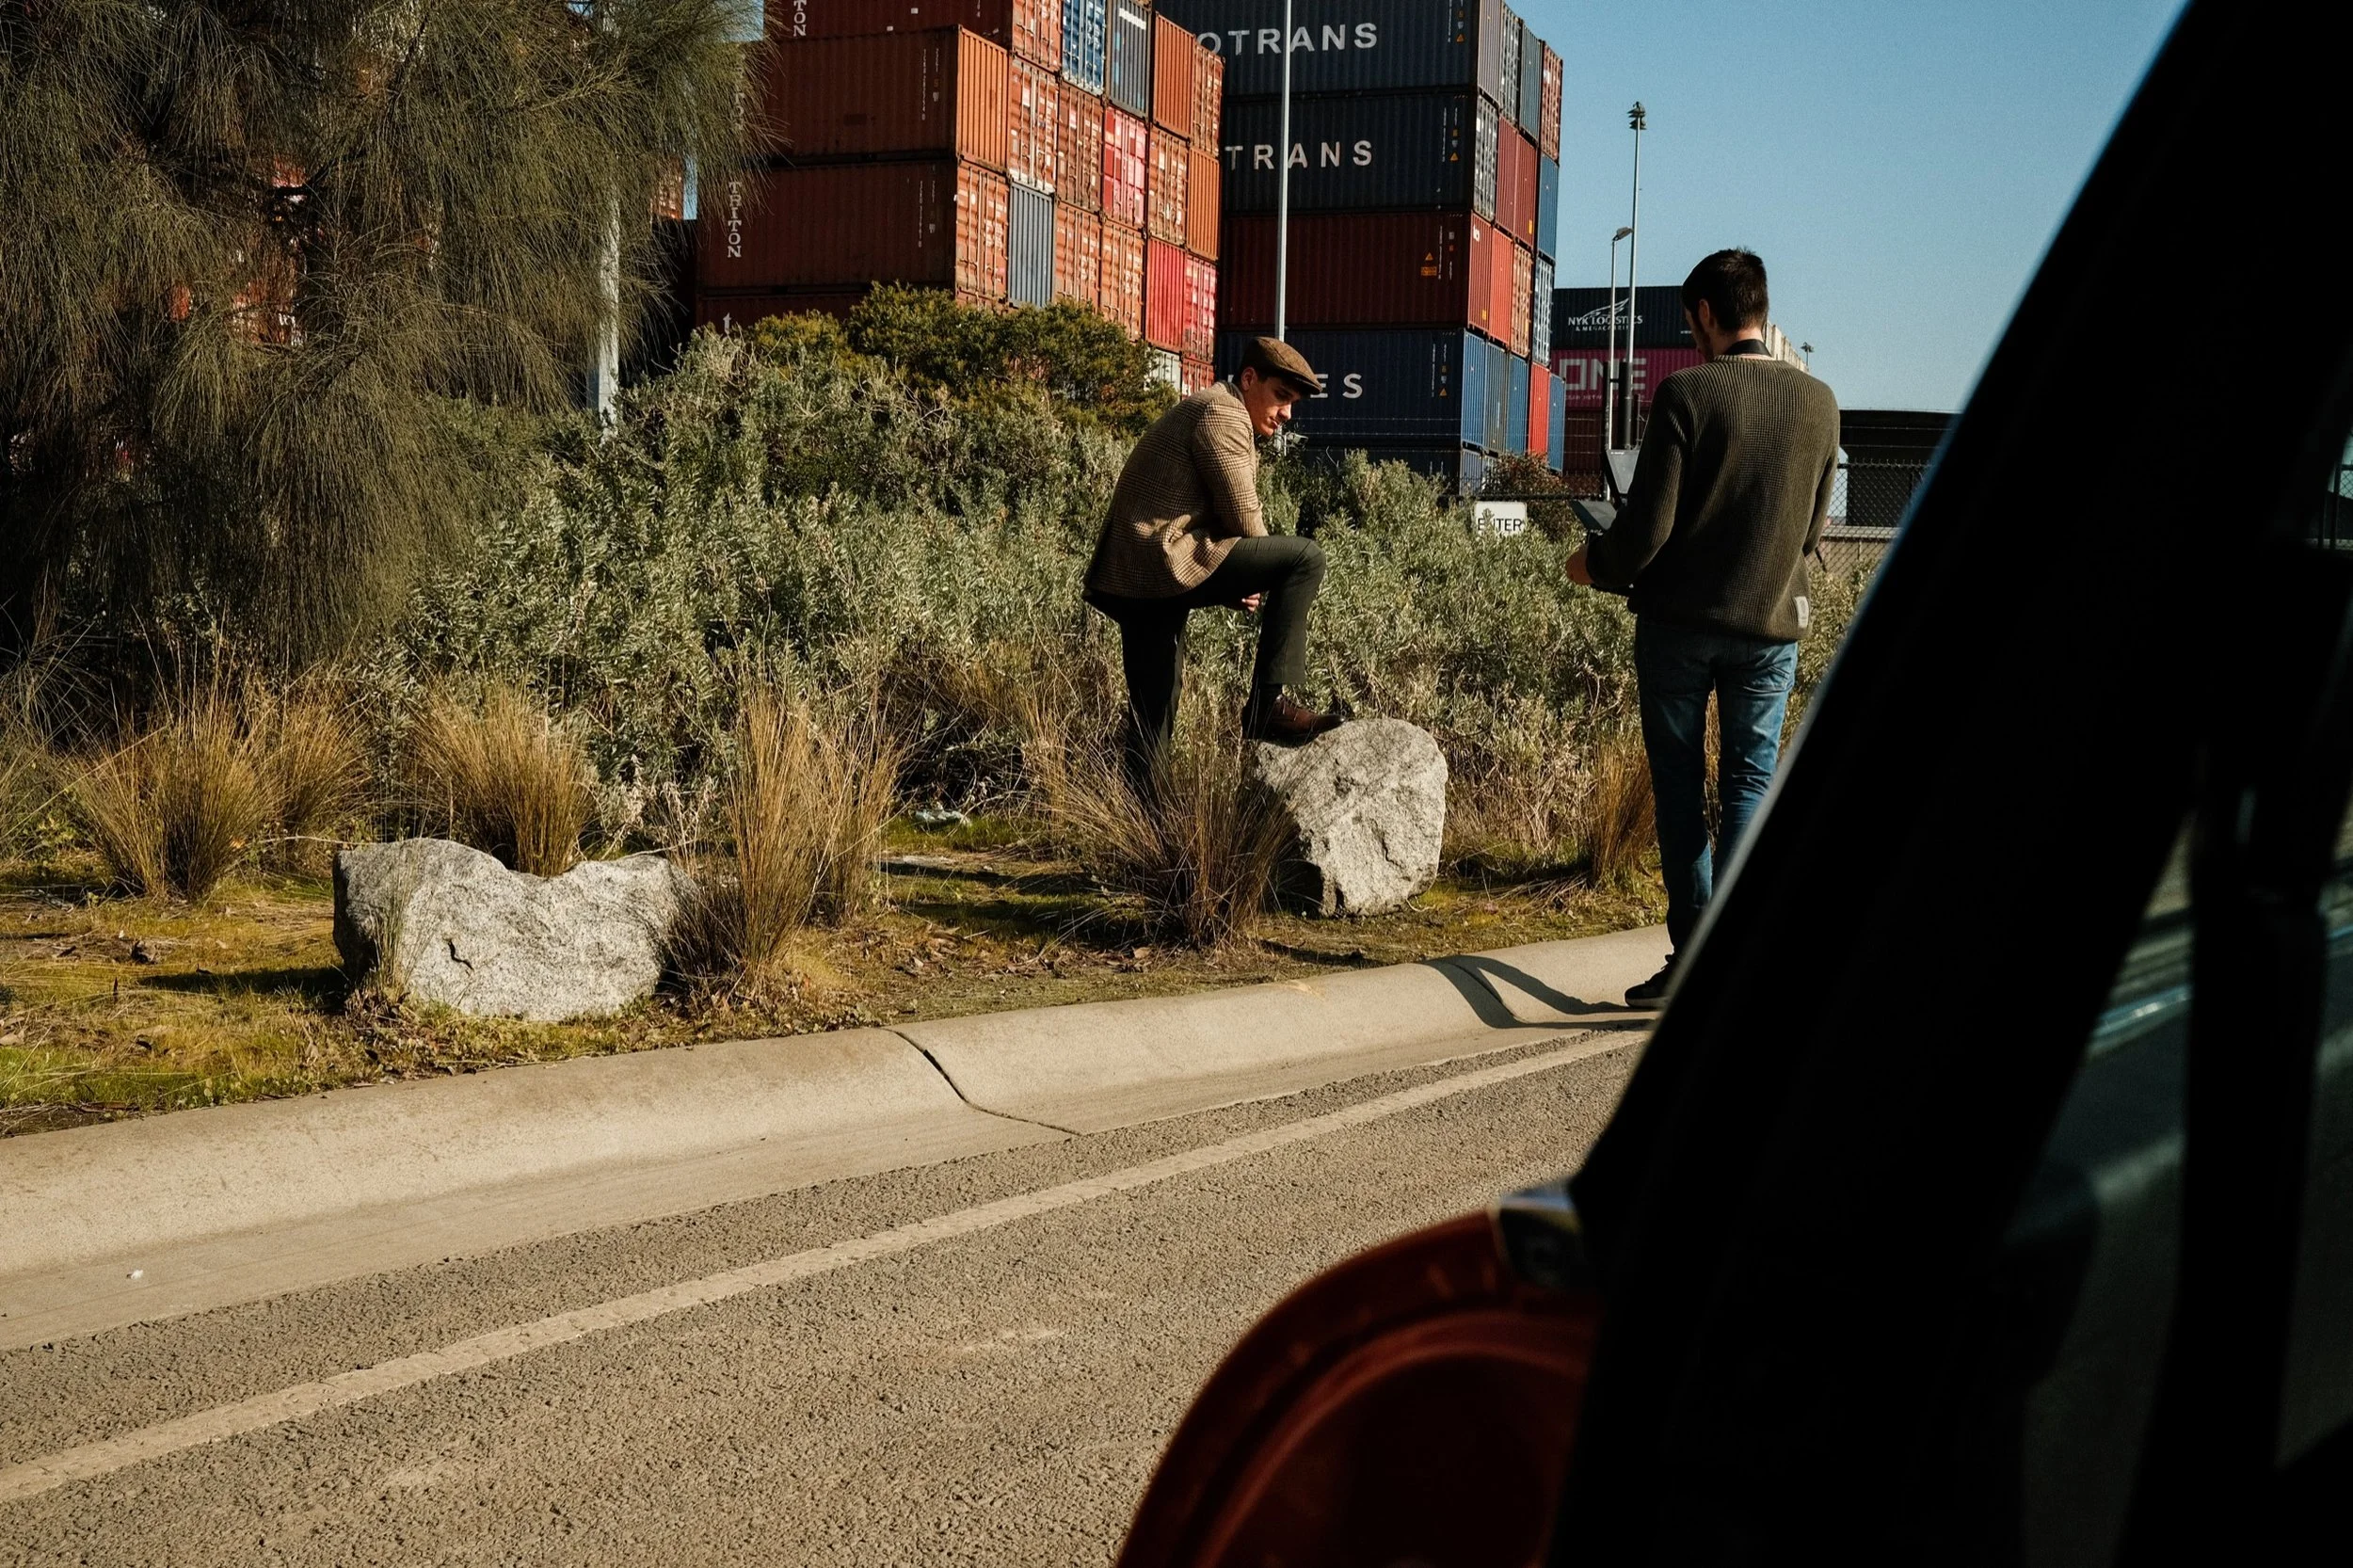
In terms of cinematography side of things for this project. We wanted to do two things, one, tell the loose but concise story of a gentleman broken down on the side of the road, fixing his luxury vehicle, and two show off the incredible attire such a lad was wearing. As a result, we captured scenes in a couple of different categories. Involving following the story of said man breaking down, fixing his vehicle, some interior shorts of some precarious firearms, starting the car, and driving off into the sunset. With additional b-roll shots of our star in the drivers seat, walking with his uniform, and sitting in and around the area, which also established the idea that he’d been there for quite some time. Luckily, he’s a qualified mechanic! (Kinda)
Getting enough, but not too many shots is always a challenge, but with most shots I followed a process / tip I discovered from talented creator Edward Lee, involving getting a wide of every scene, a medium and a close up for texture. Giving you variety, when editing a sequence later. In the end, we shot of 25 - 30 minutes of footage. Using only 1 minute in the end. Standard! The shoot was completed in 3 hours, with Luca Simpfendorfer as talent and Tia Jupi as my second camera and special effects operator. Legends!


Post Production:
As hinted, there were two main things in post that needed to be done. Creating the 90s daylight film look, and stabilisation.
Creating the look. Now this was a challenge. Film stock has always fascinated me when watching older films. (Reservoir Dogs another great example of this). Films can be shot in broad daylight, with the film playing back in what seems not blazingly bright. Something I’ve found that digital cameras struggle with at time, providing a very, high contrast look. So through the grade, I wanted to replicate the outdoor bright look of 90s film, the appropriate amount of grain all without completely crushing the shadows. The base of my grade used was converting BRAW to Rec709 at the end of my Davinci Resolve Nodes, using Film Convert and the Film Stock Kodak KD52123 Vis 3, with Film Color set at 100, Super 35 Film Grain, at about 50 - 75, depending on the shot.
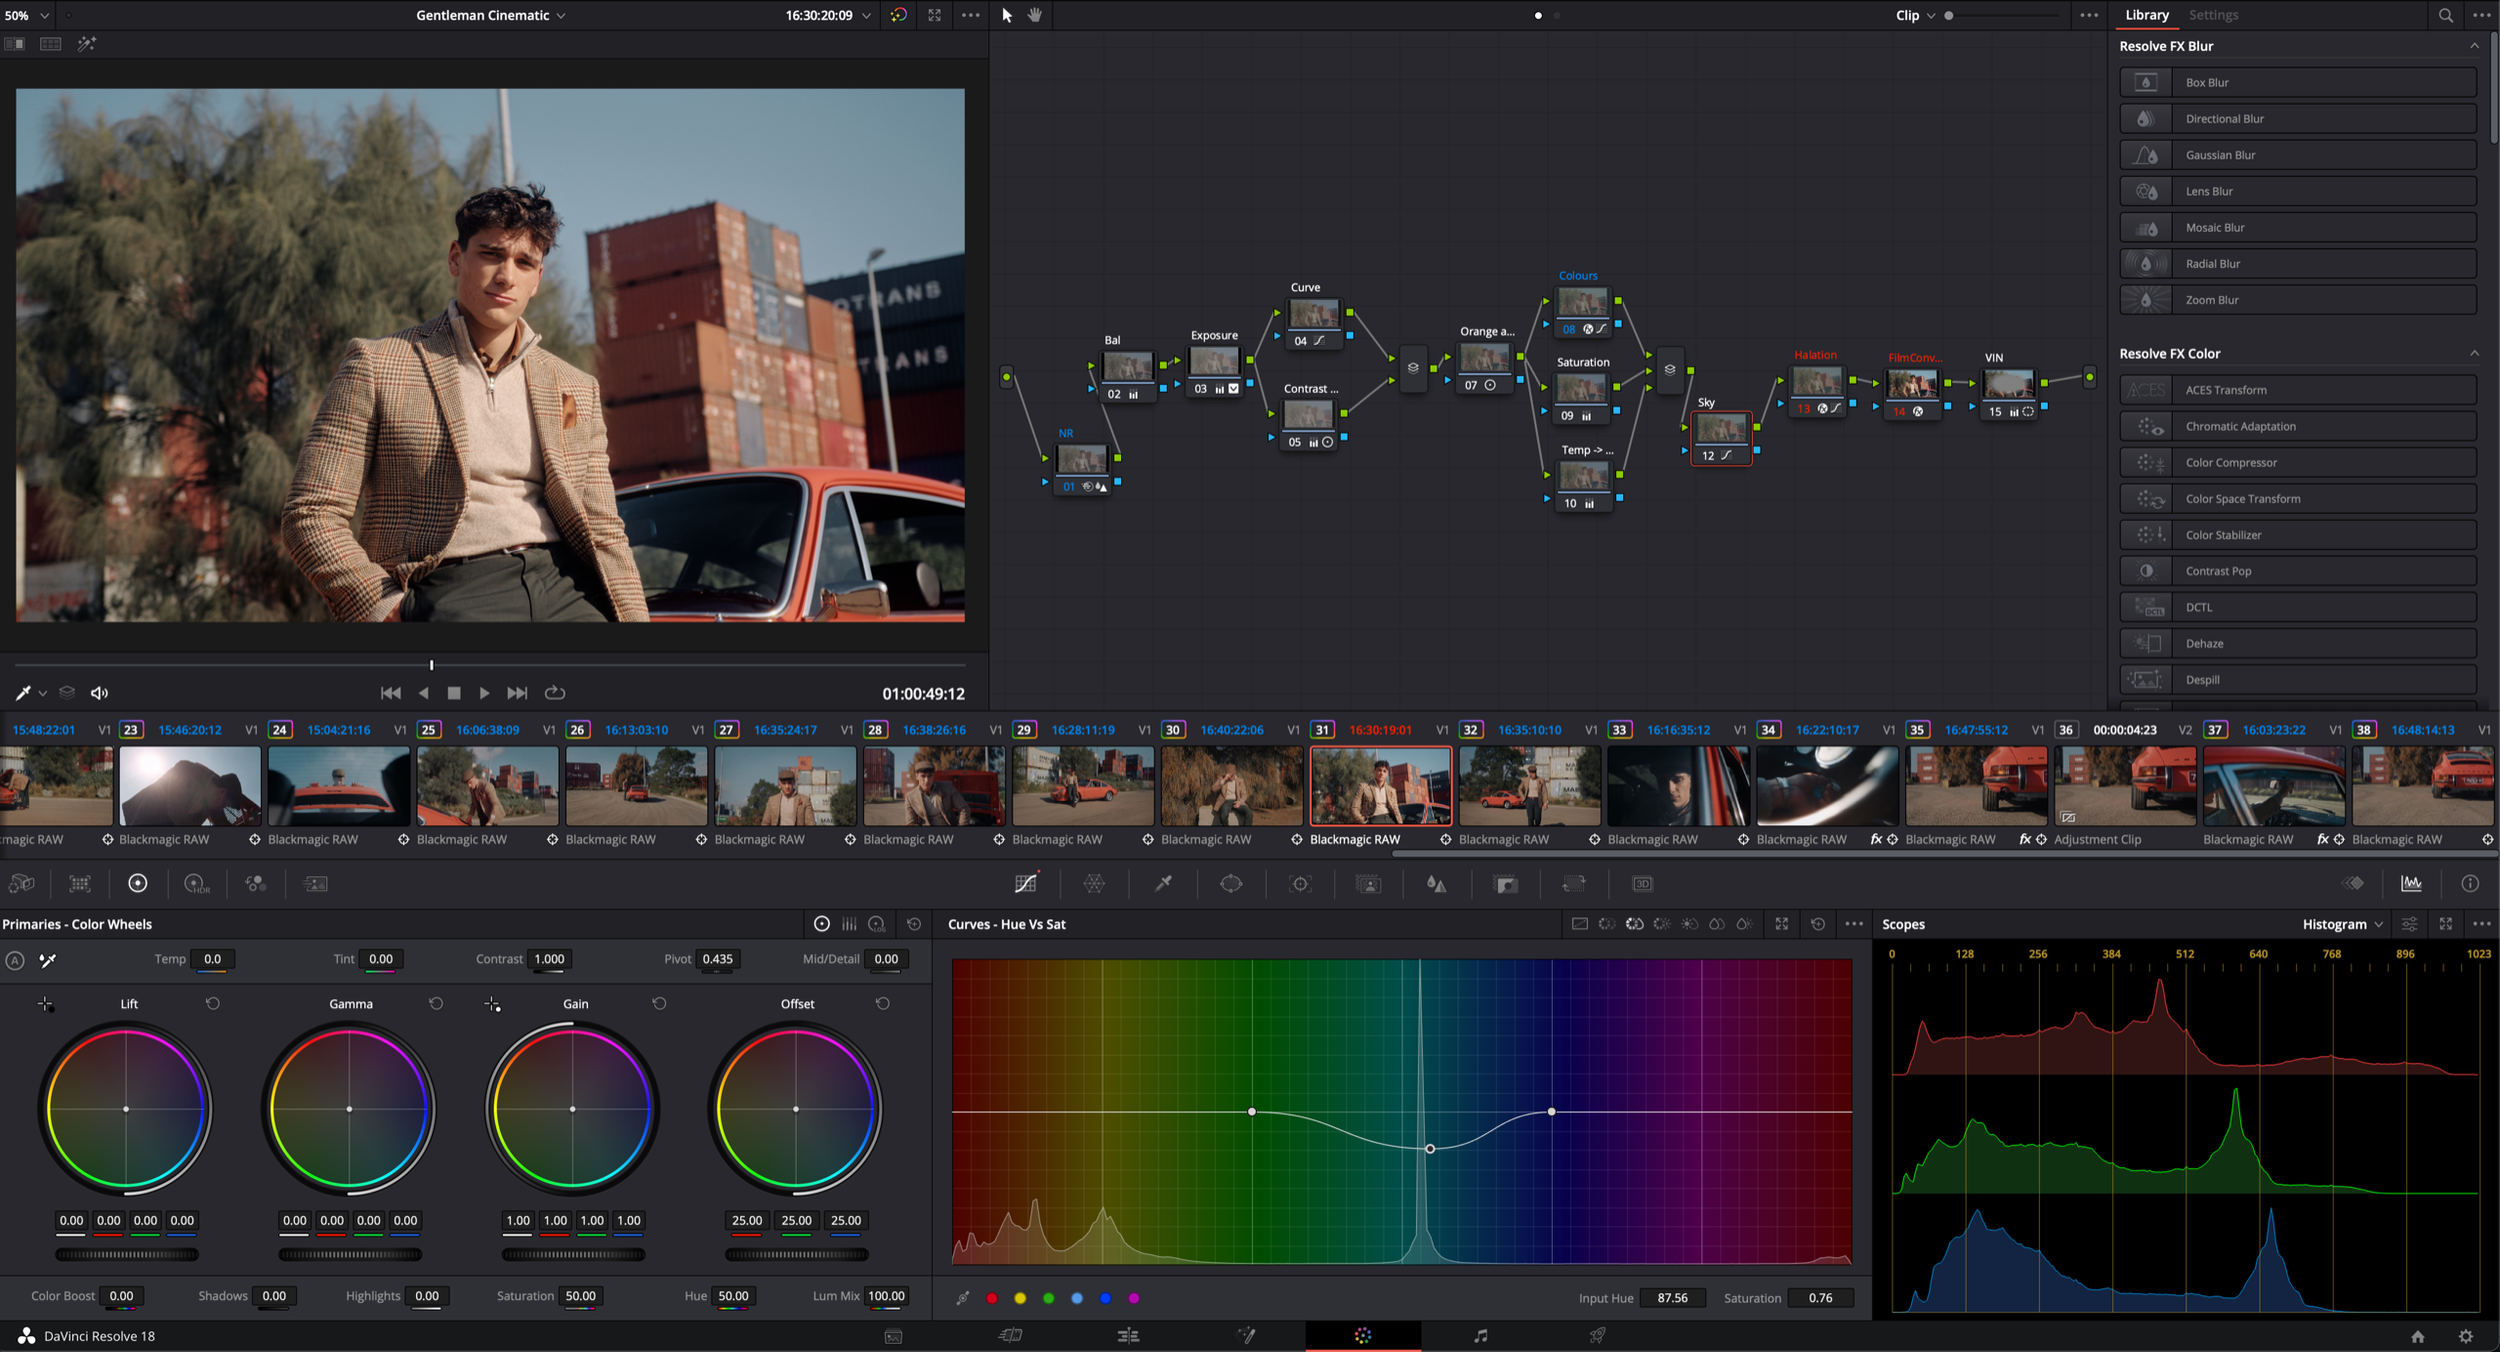
Node Structure for the Color Grade in Davinci Resolve 17.
This acted as a very good base for my grade, but was nowhere representative of the final look. What came before and after included, a 13 node structure, involving exposure adjustments, contrast curves, power windows, and quite importantly, utilisation of Davinci Resolve’s built in Halation filter, an effect when used sparingly but tastefully, a great tool for creating “a film” look, a presence that was very common in the highlights and specular highlights of film. Quickly looping back to the ""not blazingly bright” formats of inspiration. I kept the bulk of my grades, in each frame, below 512 IRE on my histogram, which is a common practice in a lot of higher end films. A great, yet difficult tip to follow I’ve found, as it’s quite easy to crush blacks, destroying your image, or losing contrast, whilst trying to keep everything within these boundaries. This may not be professional advice at all, but it definitely guided me far closer to getting the look I desired.
Lastly a couple of hue changes to the sky, and using power windows to brighten up my subject and certain parts of the frame, and voila! The final image was done, and could be applied consistency to most frames, with some clips requiring more attention than others, due to large changes in exposure between takes.
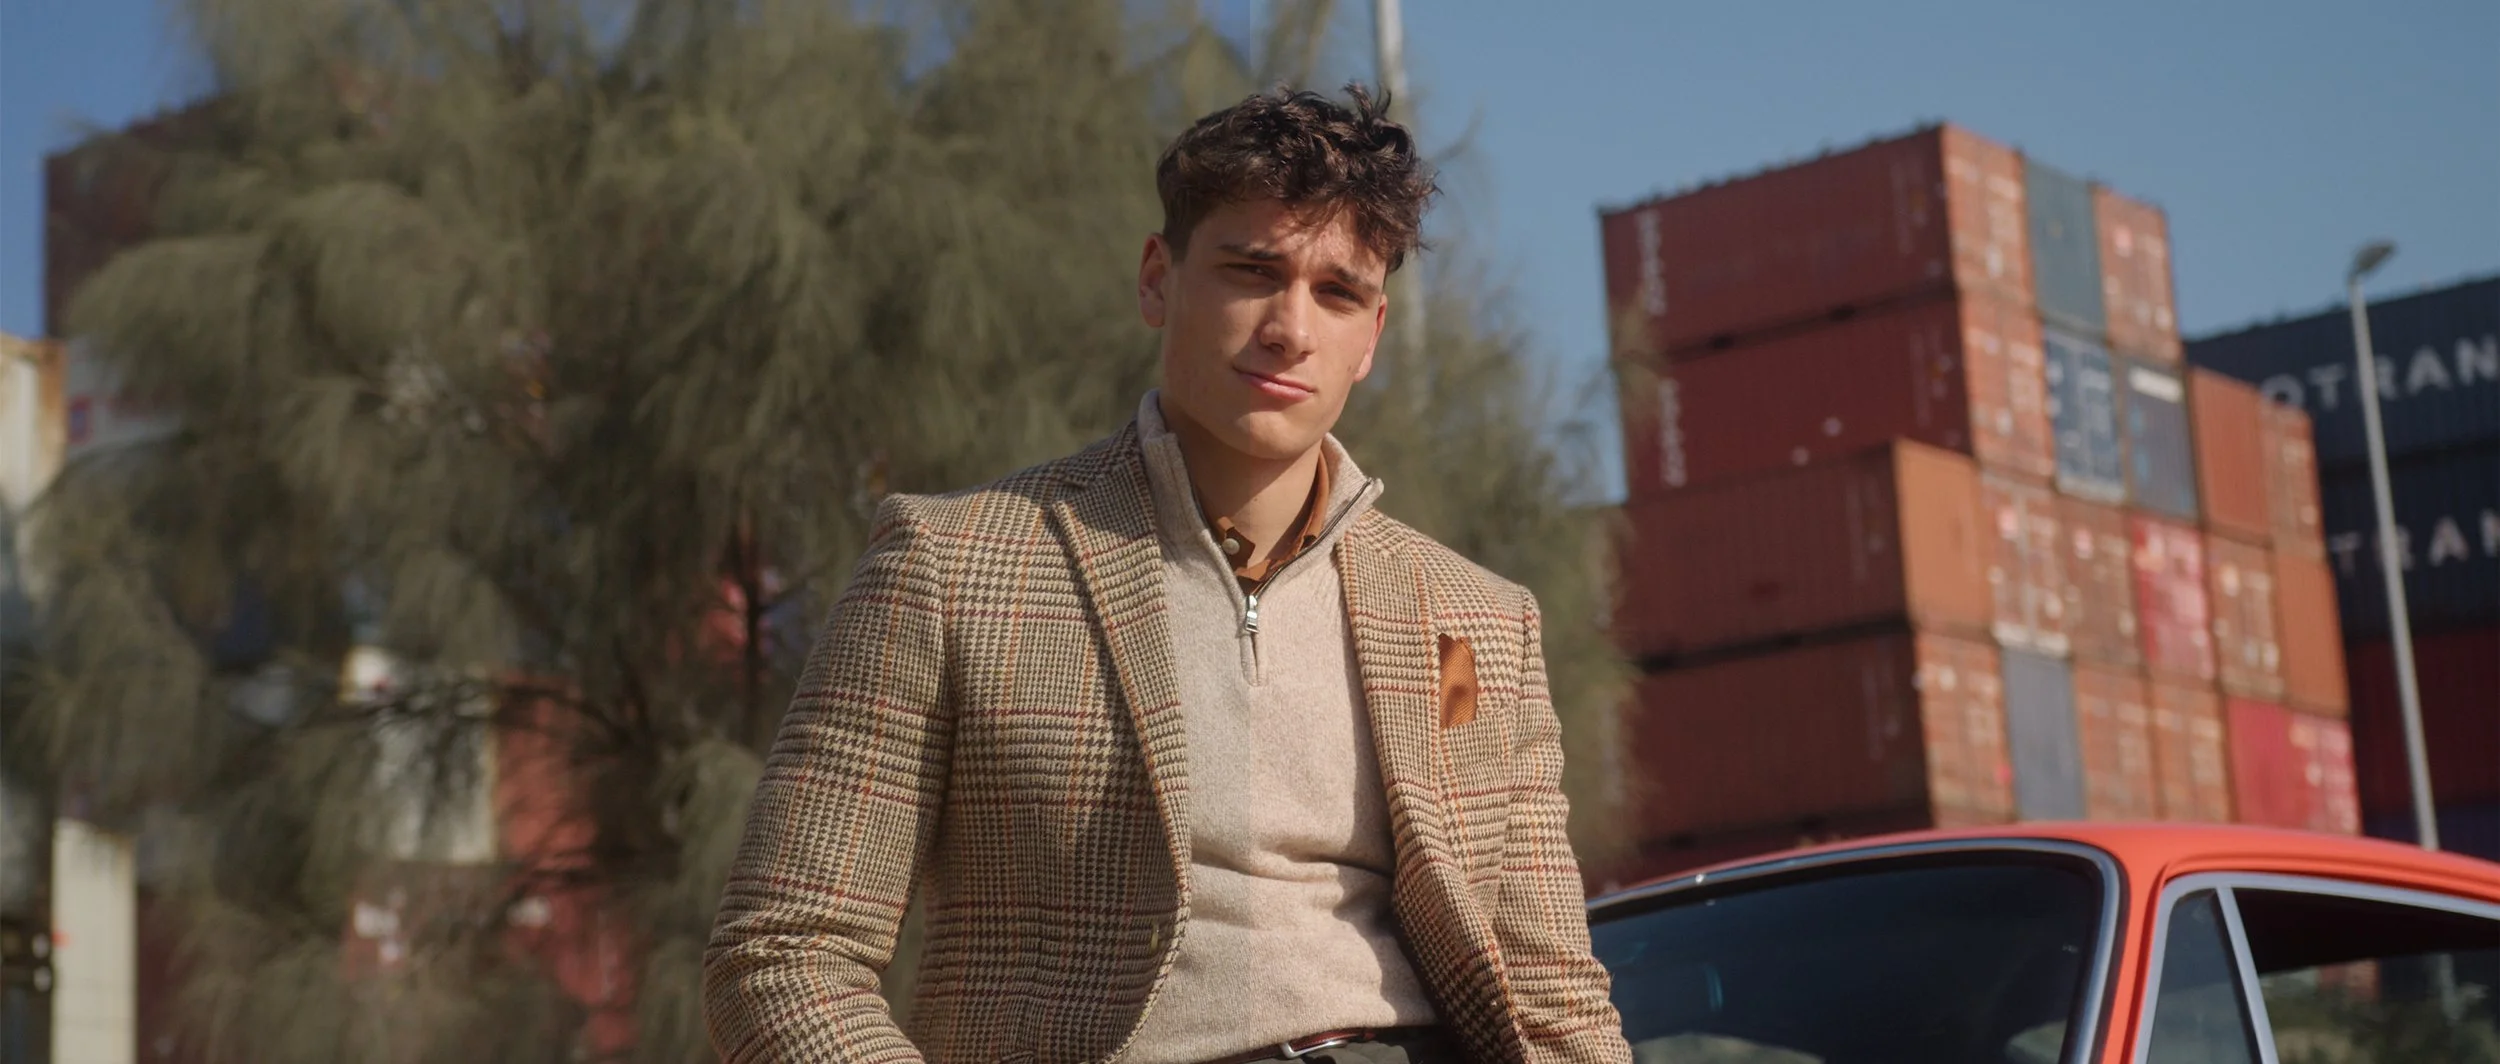
Rec709 (Left) - Final Graded Image (Right)
Concluding Thoughts:
Overall, I’m incredibly please with the results of how the Fashion ad turned out, and with the available resources, I couldn’t of been happier. Despite all the hard work that went into the shoot and edit, what I’m mostly taking away from this project, is the power of support holds over any production. You get great people, you’ll make something wonderful, or at least have a good time doing it. Shoutout to Luca and Tia once again for incredible work and support on this one. I’ll reserve my final words on this one addressing my key takeaways, and that predominantly includes the fact that we were able to achieve the desired look, finally! Although a challenge, we most certainly got there, from a grade perspective and set / costume design. Special thanks again to Mitchell McCabe of South Melbourne, for having us on for this project, can’t wait to produce more like it.
Of course, some learnings or things I’d change for next time. Definitely bring lighting modifers / diffusers / shapers, to assist with the harsh sunlight, and additionally, provide a bit more attention to detail to stroryboarding prior to shooting. These two learnings in hand would minimise our rushed time on location, improving the quality of our lighting setups and delivering a more concise shoot.
If you have any questions, please don’t hesitate to email me at hello [at] designedbykirk
Watch the Full Video Here: